My Journey With Keri Smith's Wreck This Journal

Showing posts with label recycling. Show all posts
Showing posts with label recycling. Show all posts
Thursday, January 5, 2017
What does a finished Wreck This Journal look like?
Here's my "One More Thing" about Wreck this Journal. If you didn't know, I've spent a few years finishing this book up and covering it through blog posts extensively. Here is the final product, as finished as it will ever be! Here's to moving on to new things and celebrating past accomplishments.
Wednesday, August 31, 2016
Green Horn Shrine

I don't do many sculptural pieces but sometimes I get inspired by weird objects that I find, similar to when I made that Junk Wind Chime with an old crushed beer can. I don't know why I get these urges to make things with discarded junk, I suppose it's the pack rat in me that hates to see "interesting" things get thrown away. Anyways, this project started out as a hollowed out styrofoam block. "Perfect shape for a shrine!" I thought. I also knew the perfect thing to honor - my fleeting youth. I had just moved out of my parents house again and I was feeling both horribly naive and painfully aged at the same time. What a strange feeling it is, to have to be an adult but still feel like a baby! And so I dedicated my shrine to that.
 |
| According to Webster, a Green Horn is "a person who lacks experience and knowledge." It brings visions of a young buck that is just coming of age- The prime of their life, strong and youthful, their horns still budding and new, fresh and green, full of arrogance and naivety. Sometimes I feel like that buck. So in that way, this piece is somewhat of a self portrait. |


By the way, on the subject of shrines, I'm obsessed with them. There are so many beautiful examples out there of artist shrines that inspired me a lot. I love the idea of inserting symbols and relics into a shrine that are significant to only you, making them ultra personal and kind of "secretive" works of art for the viewer to decipher on their own. Here are some amazing examples of artist shrines that embody those ideals. Some of their meanings are more obvious than others.
 |
| By Jones Moore |
 |
| By Mai-Liss |
.jpg) |
| By Collette Bain |
 |
| By Cindy La Ferle |
 |
| Shadow box shrines made with dollar store frames by Cut Out and Keep |
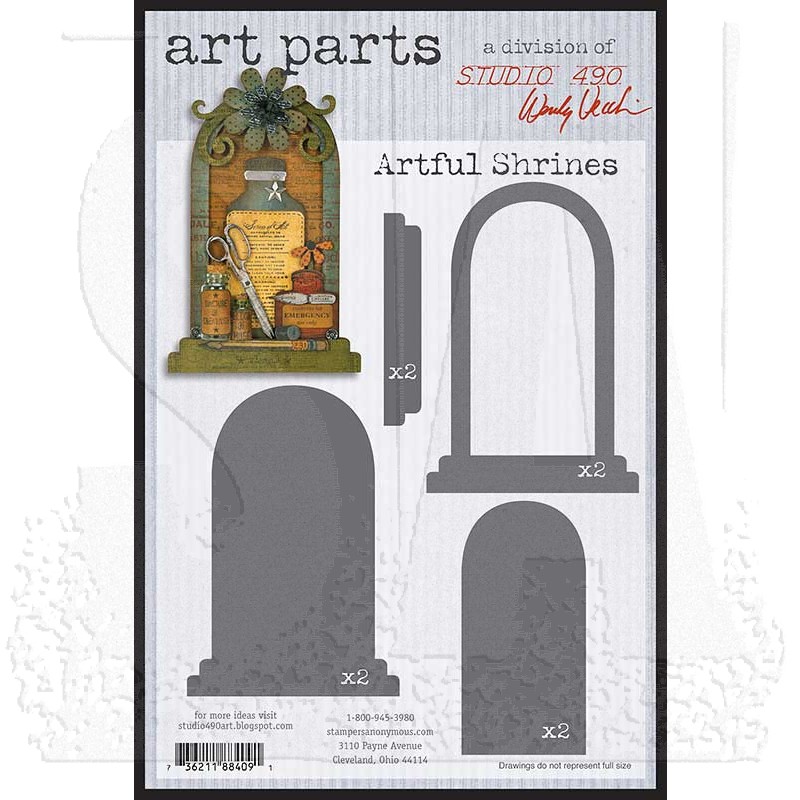 |
| Paper Shrine Template by Stampers Anonymous |
 |
| Make a Gratitude Shrine by Crizmac |
Friday, March 18, 2016
How to make a T-Shirt Bag
I have a weird fascination with recycling tshirts and other discarded clothing. I think it has to do with the fact that I just happen to have a huge collection of cool shirts with prints of interesting things on them and it's hard for me to let go when they're too worn out or don't fit anymore. I just want them to be useful again! And so, I love it when I come across projects like this that make it easy for me to re purpose one of these cool shirts in an actually relevant way. Whatever your reasoning behind wanting to recycle your old threads, here's how you can make your own t-shirt bags easily at home.
Before we begin. Firstly, your life will be a lot easier if you can get your hands on a sewing machine and actually know how to use it. For this tutorial, I'm going to be using one for the sake of time and sanity. If you are a glutton for punishment, you're more than welcome to hand sew it, but I can't guarantee it will be as sturdy as if you had done it with a machine. On the bright side, this is a great beginner's project for a sewing machine. If you have the chance and haven't yet, why not give it a try?
Step 1. Get some cool tshirts. Or not. Maybe use that ugly long sleeved black turtleneck that kept riding up every time you tried to sit down somewhere. Get revenge by having to cut it up! But that's just an example. Even though t-shirts are the easiest to use for this project, there are other options. Any kind of old clothing would work. I think the ultimate goal would be to try to find something to re-purpose.... saving the environment that way, y'know?

Step 2. The next step would be to lay out the shirt for cutting. I have been known to free hand this step, but a wise person would find a pencil or something to mark where they want to cut before they go crazy with the scissors.

Step 3. Cut it up! Begin by cutting the bottom off of your t-shirt to make the straps. Start by cutting a big strip and then fold it in half and cut it again to make it into two fairly even strips (There will be four strips total if you count the back and the front.) Then, cut the sleeves and collar off evenly so that you have a nice, straight, rectangular shapes to work with. Now you have all the pieces cut that you'll need to complete your bag.
.

By the way- I am by no means a super expert at sewing, so if you need a little bit more clarity on this subject, here's an excellent tutorial that explains double folded hems. I personally don't measure the hems or use pins for this project, but they may be helpful to some.


Step 5. Now, we will sew together the strap pieces. Double up the straps so that there are two pieces stacked for each strap. Just sew a few lines right down the middle of the strips/loops to reinforce them.
 Step 6. Take your newly reinforced straps and sew one on each side of the bag. Orient the strip so that the end of it is right below the double hem of the bag. Very important- Make sure the long part of the strip is facing UPWARDS! Otherwise you will end up with a very twisted and confused strap.
To make this step more clear (because I didn't take any good pictures of it) here's a diagram to further explain the orientation of the straps and the bag piece.

Step 7. Now it's time for the final construction step! Put the back and front of the bag back together, print sides facing inward, and sew up the sides. Be very thoughtful about your seam allowances and don't sew too closely to the edge. I usually make two three separate passes with the thread, to ensure it won't be busting a seam any time soon.

Step 8. Turn the bag right side in and take a step back. Admire the bag. See how many things you can fit in the bag. Pet the bag. Marry the bag. OK, maybe just date the bag because you aren't ready for that kind of commitment yet.
Seriously though. These things take a very impressive beating! And it was so easy to make, too.
Don't get freaked out over little (or big) mistakes while sewing this bag. It's supposed to be kind of shabby chic anyways, so there's a lot of room for variation. For example, check out how badly I messed up on some of the steps at first...
I guess my point is, don't be discouraged if your bag turns out not being exactly "perfect." Sewing projects can be tricky sometimes, but are often very much worth it!
Still a little wary about construction? Try to make an easier version of this t-shirt bag. It doesn't involve as much complicated sewing. All you need to do is cut off the collar and the sleeves, kind of in the shape of a U. This will give the bag shape. From here, just sew up the bottom of your t-shirt and you'd have something that would function like a bag. And that's it. However, this quick and dirty job won't last for very long, and you will end up with a bag that eventually starts tearing apart or stretching out too wide. Still, if you have a lot of t-shirts that you'd like to utilize or you don't want to go through all the trouble of cutting and sewing the pieces for your bag, this is another way to go!
Try painting a design or a pattern on the t-shirt before cutting it up to make it even more one of a kind. For example, I spray painted a stencil of some skeleton hands on this stripey bag I made out of an old tank top. I also added a little ribbon trim to the top for a hem instead of folding over the shirt itself.

Do you have a t-shirt that has long stretchy sleeves that keep getting tangled in your washing machine? Time to get that revenge. Utilize those pesky sleeves by making the shirt into a messenger bag. The sleeves can become just one big strap! I didn't end up having to sew the sleeves at all, I just tied them together in a few knots and done.
A few words of caution. Pointy things are these bags' worst enemy. You're more likely to stab a hole in the thing than bust a seam. Be careful with scissors and sticks, I've blown out a few bags because of these items.
Weight can also be an issue, but not as much as you'd think. While the bags don't have issue with holding tons of objects inside, carrying them around by their handles when the bag is over loaded can sometimes result in tearing of the fabric itself. I also like to hang these things in closets with hangers and sometimes the bags are so heavy the hangers warp so much that they fall down!
There are so many different uses for t-shirt bags. A lot of people use them to save money on grocery bags. I personally use them mostly for storage purposes - all of my pajamas, underwear, socks, and other odds and ends get tossed into these bags and it saves me time and space. They're great if you have a huge haul of stuff to carry and you need a bag ridiculously big enough to hold it all. The expanding capacity of these bags is actually really amazing.
I'll conclude this tutorial with an invitation to show off your own recycled bags or any other project that utilized second hand materials in a practical way. How did they turn out? What do you use them for now?
Also, If you have any questions about this tutorial or any more ideas on the subject of how to make your own bags, please do leave me a comment below!
Before we begin. Firstly, your life will be a lot easier if you can get your hands on a sewing machine and actually know how to use it. For this tutorial, I'm going to be using one for the sake of time and sanity. If you are a glutton for punishment, you're more than welcome to hand sew it, but I can't guarantee it will be as sturdy as if you had done it with a machine. On the bright side, this is a great beginner's project for a sewing machine. If you have the chance and haven't yet, why not give it a try?
Step 1. Get some cool tshirts. Or not. Maybe use that ugly long sleeved black turtleneck that kept riding up every time you tried to sit down somewhere. Get revenge by having to cut it up! But that's just an example. Even though t-shirts are the easiest to use for this project, there are other options. Any kind of old clothing would work. I think the ultimate goal would be to try to find something to re-purpose.... saving the environment that way, y'know?

Step 2. The next step would be to lay out the shirt for cutting. I have been known to free hand this step, but a wise person would find a pencil or something to mark where they want to cut before they go crazy with the scissors.

.

Step 4. Time to get sewing. Working with the printed side facing down, fold over a strip of the top of the bag and carefully sew a double folded hem. Repeat this step for both the back and front pieces of your bag. Only sew a hem at the top, don't worry about the sides or bottom.
The hemming will give your bag structure and keep it from stretching out infinitely when you start using it to put stuff in.
(You can hem all 4 sides of the bag if you want for extra fanciness but this is absolutely not necessary. That'd only be an effect for aesthetic purposes and maybe a little bit of extra structure.)
(You can hem all 4 sides of the bag if you want for extra fanciness but this is absolutely not necessary. That'd only be an effect for aesthetic purposes and maybe a little bit of extra structure.)
By the way- I am by no means a super expert at sewing, so if you need a little bit more clarity on this subject, here's an excellent tutorial that explains double folded hems. I personally don't measure the hems or use pins for this project, but they may be helpful to some.


Step 5. Now, we will sew together the strap pieces. Double up the straps so that there are two pieces stacked for each strap. Just sew a few lines right down the middle of the strips/loops to reinforce them.
 Step 6. Take your newly reinforced straps and sew one on each side of the bag. Orient the strip so that the end of it is right below the double hem of the bag. Very important- Make sure the long part of the strip is facing UPWARDS! Otherwise you will end up with a very twisted and confused strap.
 To make this step more clear (because I didn't take any good pictures of it) here's a diagram to further explain the orientation of the straps and the bag piece.
Tip- Sew a square over the strap ends and finish it off with an X to make a sturdy bond between the strap and the bag front.

Step 7. Now it's time for the final construction step! Put the back and front of the bag back together, print sides facing inward, and sew up the sides. Be very thoughtful about your seam allowances and don't sew too closely to the edge. I usually make two three separate passes with the thread, to ensure it won't be busting a seam any time soon.

Step 8. Turn the bag right side in and take a step back. Admire the bag. See how many things you can fit in the bag. Pet the bag. Marry the bag. OK, maybe just date the bag because you aren't ready for that kind of commitment yet.
Seriously though. These things take a very impressive beating! And it was so easy to make, too.
Other Helpful Tips:
Don't get freaked out over little (or big) mistakes while sewing this bag. It's supposed to be kind of shabby chic anyways, so there's a lot of room for variation. For example, check out how badly I messed up on some of the steps at first...
 |
| Remember that step that I said was really important? Well, I ignored my own advice at first and I accidentally sewed the strap downward facing instead of upwards... now there's an extra fold there... oops... |
 |
| Also, check this out... I originally sewed the strap to the completely wrong side of the bag altogether. HOW DOES SOMETHING LIKE THIS EVEN HAPPEN!?! I had to cut it off and start over, haha. |
I guess my point is, don't be discouraged if your bag turns out not being exactly "perfect." Sewing projects can be tricky sometimes, but are often very much worth it!
 |
| "Grocery Bag" Design |
Even moar ideas:

Try painting a design or a pattern on the t-shirt before cutting it up to make it even more one of a kind. For example, I spray painted a stencil of some skeleton hands on this stripey bag I made out of an old tank top. I also added a little ribbon trim to the top for a hem instead of folding over the shirt itself.

Do you have a t-shirt that has long stretchy sleeves that keep getting tangled in your washing machine? Time to get that revenge. Utilize those pesky sleeves by making the shirt into a messenger bag. The sleeves can become just one big strap! I didn't end up having to sew the sleeves at all, I just tied them together in a few knots and done.
 |
| Spaghetti straps re-imagined! I keep all my underwear in this bag. Seriously... |
A few words of caution. Pointy things are these bags' worst enemy. You're more likely to stab a hole in the thing than bust a seam. Be careful with scissors and sticks, I've blown out a few bags because of these items.
Weight can also be an issue, but not as much as you'd think. While the bags don't have issue with holding tons of objects inside, carrying them around by their handles when the bag is over loaded can sometimes result in tearing of the fabric itself. I also like to hang these things in closets with hangers and sometimes the bags are so heavy the hangers warp so much that they fall down!
There are so many different uses for t-shirt bags. A lot of people use them to save money on grocery bags. I personally use them mostly for storage purposes - all of my pajamas, underwear, socks, and other odds and ends get tossed into these bags and it saves me time and space. They're great if you have a huge haul of stuff to carry and you need a bag ridiculously big enough to hold it all. The expanding capacity of these bags is actually really amazing.
I'll conclude this tutorial with an invitation to show off your own recycled bags or any other project that utilized second hand materials in a practical way. How did they turn out? What do you use them for now?
Also, If you have any questions about this tutorial or any more ideas on the subject of how to make your own bags, please do leave me a comment below!
Wednesday, February 17, 2016
Quick Crafty Bathroom Caddie!
 | |
|
The larger caddie took a little bit of extra fandangling on account of it lacking any kind of handle or hook to hang it from. All I did was cut four slits in the top of the bag, just big enough to fish some old scrap ribbon through and tie in knots. To keep the slits from tearing I hot glued some strips of fabric over the cuts. The little flowers glued on top aren't really functional, they're there more for flair. After that, it was just a matter of tying the ribbon handles into bows around the towel rack. Easily adjustable and simple to take down if need be!
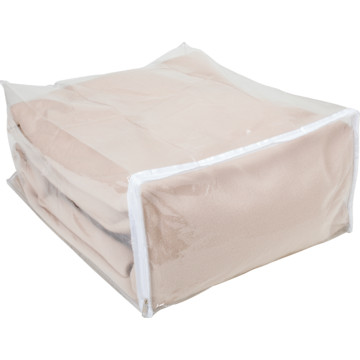 My favorite thing about my caddies is that they're see through vinyl, which gives me easy access to my supplies without the need to rifle around.
There are so many different uses for vinyl blanket bags.They often have multiple pockets and dividers already incorporated, which further helps in keeping things organized. Some of them even have handles. These bags can also be pretty durable and withstand years of wear and tear- I've used them to hold craft items like beads and markers in the past. My marker bag, for example, served me loyally through high school... Yes, I was the weird girl randomly toting around a gigantic bag of markers.
Next time you get a new comforter blanket, or maybe even some curtains, consider all the awesome stuff you could put in those bags instead of tossing them out to let them unjustly rot in a landfill forever. It's especially wasteful considering some places sell them as organizers for upwards of $12 a bag! Doing a search about blanket bags will yield a plethora of things to do with your bags. There are some really great ideas!
Other uses for comforter bags:
- Sturdy gift bags for birthdays & holidays
- Store your kid's small toys- like legos and action figures
- Christmas ornament storage bags
- Keeping garden seeds fresh for longer
- A travel bag or first aid kit for vacations
- Protecting clothing or linens from smoke/bugs/dander/ect
- So, so many more things. Seriously. They're super handy.
| What kind of uses can YOU come up with? |
Friday, April 19, 2013
Wreck This Journal Part Four

WRECK THIS JOURNAL 4 - THE RECKONING
That's what this blog post would be called if it were made into a movie... of course you'd have to watch the first, second and third installation before you could watch this one. Otherwise you'd totally have no idea what was going on with the plot. But the good thing about sequels is that they always add in some sort of surprise element to keep the story spicy. In this case, we have a surprise walk on role from my Wreck This Journal's clean cut, long lost brother.
See for yourself the ridiculous differences between these two books...
 |
| Keri Smith's Wreck This Journal- Before and After |
I recently purchased a brand new WTJ as a gift to one of my artist friends. I couldn't help but take some pictures comparing the two books. It's hard to believe that they are the same.. actually, the new one has more pages inside than mine does. Kinda hard to tell from the pictures, I know.
 |
| Keri Smith's Wreck This Journal - Before and After from the side. Here's a picture comparing the thickness of a new Wreck this Journal compared to my totally wrecked copy. This is where their differences become real obvious. Since I began working on it, this book has doubled in size. |
So what else is new with my journal? Lots of new pages, but the old ones are still changing all the time...
 | |
| The main thing that has happened to the journal lately is that it is completely falling apart! The covers are peeling off. The book itself has also breaking up into two equal halves. I think the only thing holding the two pieces together are some little threads of paper. |
 |
| Wreck This Journal- Table of Contents |
 |
| "Press leaves and other found things" |

Some may remember this page from previous blog posts, it is covered in rose petals. Like the changing of the seasons, the petals have almost all completely transformed from a vibrant red color to dull brown. Still, this has to be one of my most unexpectedly favorite pages in my journal.
It's been quite the challenge trying to fill up every single page of the Wreck this Journal. To combat all of that empty space, I've been doing all sorts of little doodles in my WTJ lately, including these pages:
 |
| "Scribble Wildly with Reckless Abandon" So I drew a portrait of Lana Del Rey... I'm going through a phase, I think! |
 |
| "Do some rubbings with a pencil" I think I waited too long to do this page. By the time I got to doing the rubbings, the paper was so worn down by being so wrecked that any of the rubbings that were there barely showed up! So, naturally, I drew a big fat fly's head over all of the mistakes. |
 |
| Kind of a weird page- "Chew on This"... The freaky lips and tongue are loosely based off the infamous "Open up and say Ahh!" Poison album cover. Also, suddenly maggots! |
 |
| "Tongue Painting" Okay, I kind of went crazy with this page. It all started with some sticky transparency paper and a sharpie. I drew the strange dancing figure ladies and layered them on. After that, more and more colored pencils and markers. And some lips. And some Eskimos. Like I said, this page went crazy. |
 |
| "Tie a String and Swing Wildly" I admit that I never did work up the bravery to tie a string around my journal and swing it against things. However I'm sure it's been thrown and abused enough to make up for that teeny tiny factoid. Since my last update on this page, I've added color...it kind of reminds me of some sort of weird jungle now. |
 |
| Out of everything that has been inflicted on this journal, time has effected it the most. This page is the ultimate tattoo cover up- I drew over the original drawing on this "Ugly Drawing" WTJ page because I have since let go of those frustrations and replaced it with two pieces of poop. |
 |
| "Pretend you're doodling while on the phone" |
There are a lot of pages like this in my book- half finished. I think the biggest challenge of the Wreck This Journal would definitely have to be commitment. To fill each page back and front is no easy task... it's almost like you have to rewrite the book entirely. But there's no time limit, so I feel encouraged to work only when I want to. And sometimes that means I sit my journal down for long periods of time before I get back into it again.
 |
| "Test This Page" For Science, of course. |
 |
| Still haven't done anything with this page besides color it, but I have to note it is the "last thread" keeping this book from splitting apart. "Sew This Page" seems more like a command than an instruction now! |
 |
| "Wrap something with this page" - Instead of wrapping up something in this page (which would be weird because the paper is tiny) I went ahead and made it into a cool bat person themed pocket holder. The pocket contains a napkin from Medieval Times, personal notes, stickers and other random things. |
 |
| "Cover This Page with white things" - A very interesting but tough challenge... it's like having to draw a picture entirely with a white crayon! But somehow, it works. I love how everything is "white" but all in a different shade. |
 |
| "Make a Mess. Clean it up." |

 |
| "Page of Good Thoughts" |
 |
| Atta Boy! |
One day, I was given all of these really weird / old encouraging Disney stickers, so I thought the best way to utilize these guys would be on the good thoughts page. Because Disney characters are always so overwhelmingly positive all the time. I didn't think the page was quite finished until I drew all over it with some markers and colored pencils, though.
 |
| "Write Carelessly. Now." |

It took me a long time to fill up this page! I thought it would be a quick and easy one, but I ended up going back on several different occasions to "write carelessly." It became kind of addicting after a while, though. You get an overwhelming sense of freedom from writing random trains of thought.
Working on certain pages can unexpectedly effect others... most of the time in an awesomely cool way. For example, these pages were so raw that they wrecked other pages in the process:
 |
| "Cut Through Several Layers" I didn't like the job I did the slack job I did the first time, so I got my X-Acto blade and took it to the extreme. |
 |
| "Infuse this Page with a smell" - The nose approved of the sweet perfume scent that once permeated off this page... if you sniff really hard, you can still smell a little hint of it! I like the way the cut diamonds have created an interesting pattern on this page and still somehow managed to not cut any of the words or drawing off. |
 |
| "Create a Nonstop Line" - Challenge accepted. I created a really complex nonstop maze and colored in the sides with Sharpie marker. |
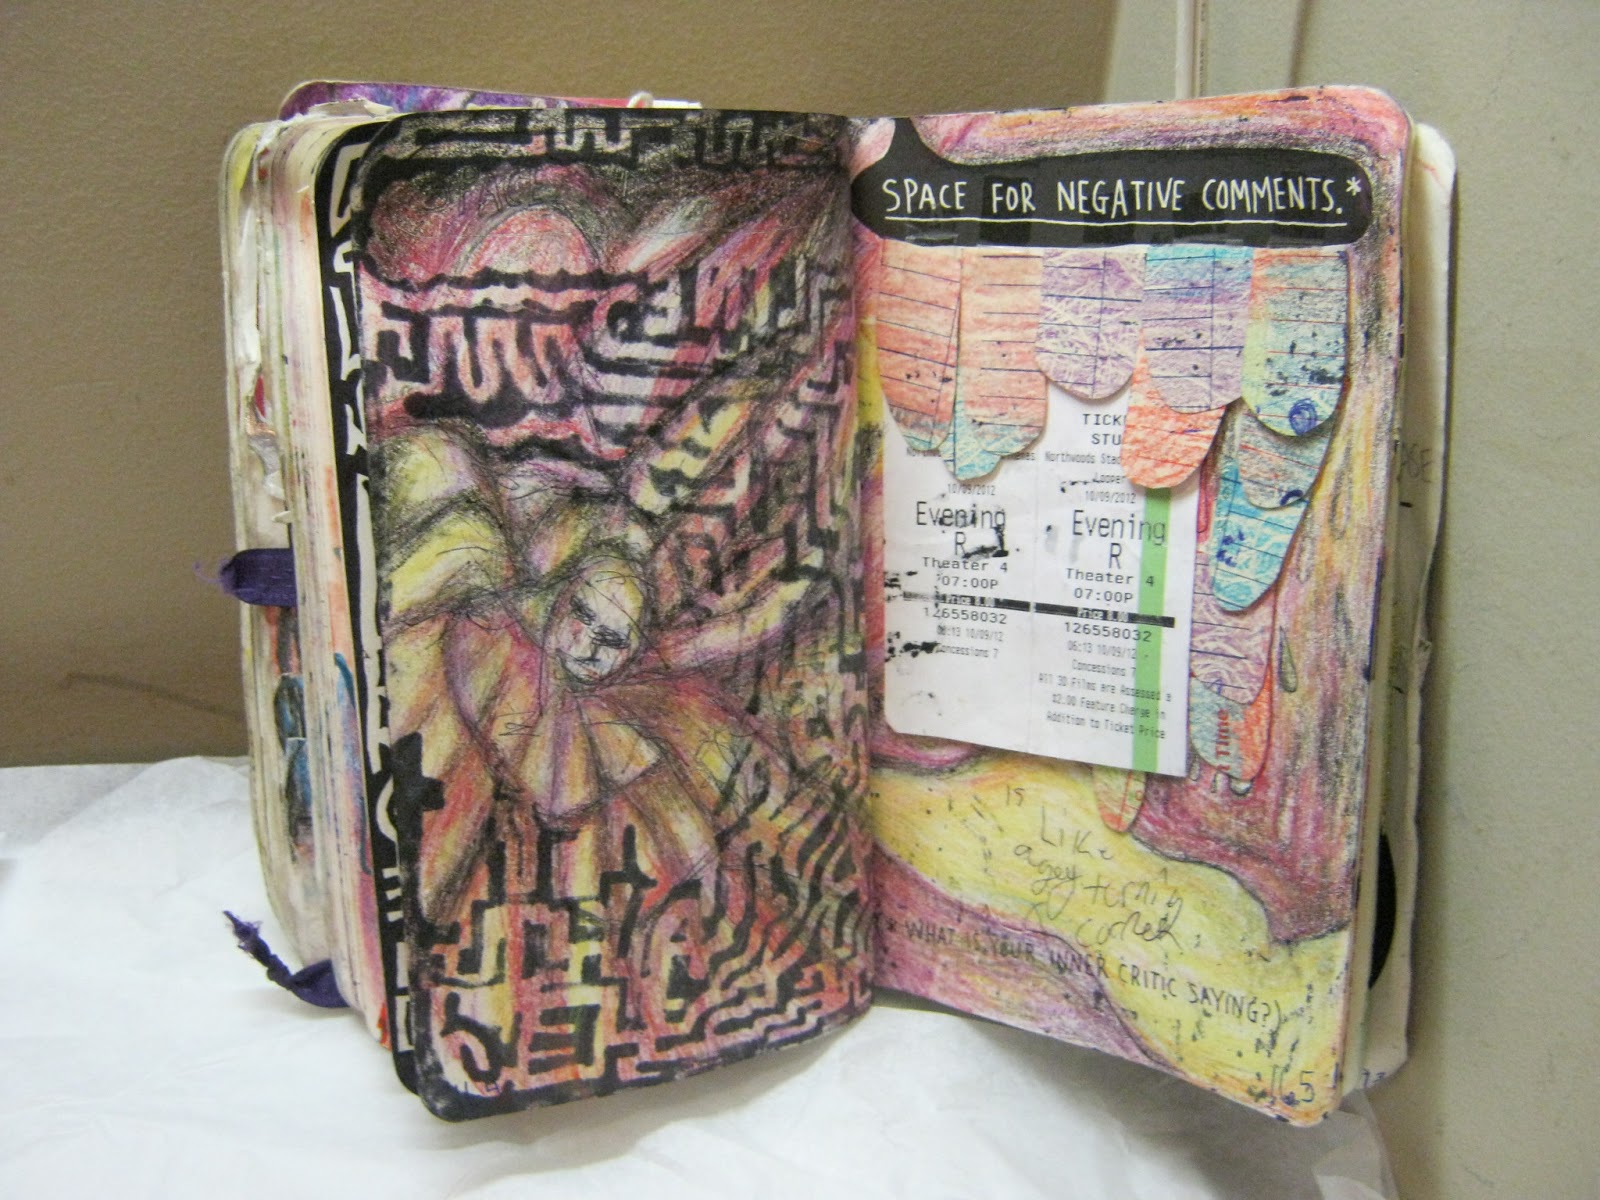 |
| "A Space for Negative Comments"- This is a collaborative drawing between me and my boyfriend. He drew the strange spider guy and I colored him in... then, accidentally bled the nonstop line maze all over it. Fortunately, the maze kind of fit around the drawing in an interesting manner. Very surreal little drawing. |
 |
| "Throw Something at the Journal" I could never quite figure out what I should use as a "ball dipped in paint" without ruining a perfectly good ball but it seems that Tiff has figured it out. Whoppers make perfect disposable paint covered ball missiles! |
 |
| "Fill This Page with Circles" - I love all the googly eyes, so cute! I also like how she utilized round containers of all different sizes as colorful paint rings. |
 |
| "Page for Four Letter Words" |
 |
| "Add your own Page Numbers" |
 |
| Probably my favorite page by Tiffany so far, "Write One Word Over and Over." It's so colorful and nice looking! |
The most important thing to remember about working in a Wreck this Journal is that you just have to keep with it. Even if you put the journal down for a whole year or something, that doesn't mean it's no good anymore and that you aren't allowed to work on it again. There aren't any rules..The book is a symbol for being able to live your life how you want to!

In conclusion, I guess I have to say that I can't say exactly how long I'll be working on my Wreck This Journal before I consider it finished. I know it seems a little extreme to try to fill up all the pages, but seriously, how many people have actually been able to complete this challenge? It would be an honor to be a part of that club, so expect more updates on new finished pages from my WTJ in the future. I'm in it for the long haul.
 |
| The only thing that can stop me is the book itself... it's falling apart at an accelerated rate at this point! |
I leave you with a few things to think about...
Firstly, does anyone have any suggestions on how I can put this book back together again? I was going to try to sew it but I'm not sure, especially if there's another option that would be more heavy duty and long term.
Also, I invite anyone that has done a few pages of their WTJ to definitely share their work! I love seeing fresh inspiration. Just drop off a link to your blog or directly to the images in the comments section. It's very interesting to see how people all interpret the pages differently and also the rationale behind their process.
As always, happy wrecking everyone!
My Journey With Keri Smith's Wreck This Journal
2) WTJ Part Two
Subscribe to:
Posts (Atom)