Punks had the right idea- customized jackets are cool. Nothing says "
Hello, I Kick Ass" like a hand sewn, decked out patch jacket. They're fascinating- each thing sewn on reveals a snippet about the owner. I think everyone should take the time to make a jacket or hoodie like this. It's super crafty and in the process you get a wicked, fully personalized article of clothing.
 |
| Facial Expression: patch jacket glee! |
This is me and my jacket. It's a work in progress, but I'm excited about how it's turning out so far. The jacket itself was a perfect find. Admittedly, I didn't go completely
punk rock and cut off the sleeves of some dirty old blue jean jacket. Instead, I found a jacket that was perfect
for me. I'll go into detail about the finding "the perfect jacket" in another post, but in the mean time I'll focus on adding one of my favorite embellishments- studs.
I get the most questions about how I put them on my jacket. People assume it includes glue or some sort of crazy sewing technique, but in fact it only takes a few simple materials and a lot of patience.
Here's how to put studs on your own stuff. In my case I've used my jacket, but you can hook them onto pretty much any textile surface you'd like.
1. Gather your materials.
Mostly everyone has an old stud belt lying around that isn't exactly
up to par anymore.
They have a short shelf life... Just from constant wear and tear,
eventually the studs will start falling off. Or even worse (like in my
case) the belt itself breaks. If this sounds like you, good news, you've now inherited hundreds of studs to put on your jacket!
If you don't have any studs, I'd suggest investing in a cheap stud belt you can recycle. You can also buy the studs online if you can't find a cheap belt in your area to purchase.
This site, for example, sells standard pyramid studs as well as many other interestingly shaped studs (I love the star ones!)
 |
| You'll need: A spent stud belt and a small wedge tool. I use either a precision screw driver or an x-acto blade. |
Another thing you will need to acquire is something you can use to pry up the studs. An eyeglass repair kit screwdriver would be a good place to start. Anything with a fine tip wedge on the end will do.
If your studs aren't attached to a belt, you can skip step #2.
2. Getting Started.
 |
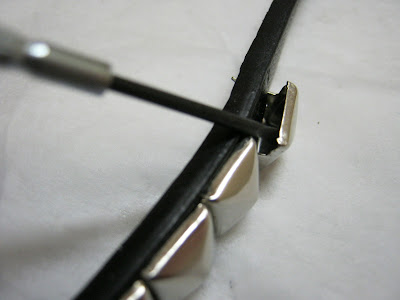
| Here's what most stud belts look like. The studs are attached by at least two metal prongs on the back of the belt. You'll eventually be securing these prongs into your jacket. |
 |
| You can get your wedge underneath these prongs and pry them upward.... |
 |
| .... thus allowing you to simply pop the studs off your belt. |
 |
| The finished result- one stud ready for use! |
I suggest only popping off a few at a time. The belt is actually a great place to keep the ones you aren't using yet... instead of chasing 100 sharp pronged pyramid studs all over the place, remove about ten at a time so you can keep up with all of them easier.
Just a disclaimer! Please remember to be careful and go slow when prying off your studs. There are so many ways for you to accidentally gouge yourself. Believe me, I've cut my hand before while working with studs because I got careless with my tools.
3. Putting the studs in your jacket.
You might want to start this step by taking some time to map out the paths for your studs. If you're planning on doing a lot of them in one place (like I did on my jacket) it's important to ensure that you're putting them on in a straight line. You can do this by lightly marking the lines with
ideally a piece of tailor's chalk. Honestly, I used a pencil instead, only because my fabric is darker and the marks don't show up as clearly. You could also try using some masking tape to create the lines. Eventually, you won't need the guide anymore because it will be obvious to where the studs should line up.
 |
| Push the stud prongs all the way down into the fabric. |
 |
| This a view of what your pushed down stud will look like from the back. Take your tool (or your thumb) and bend the prongs straight down towards the center of the stud. Secure them tightly as possible by forcing the prongs inward. |
 |
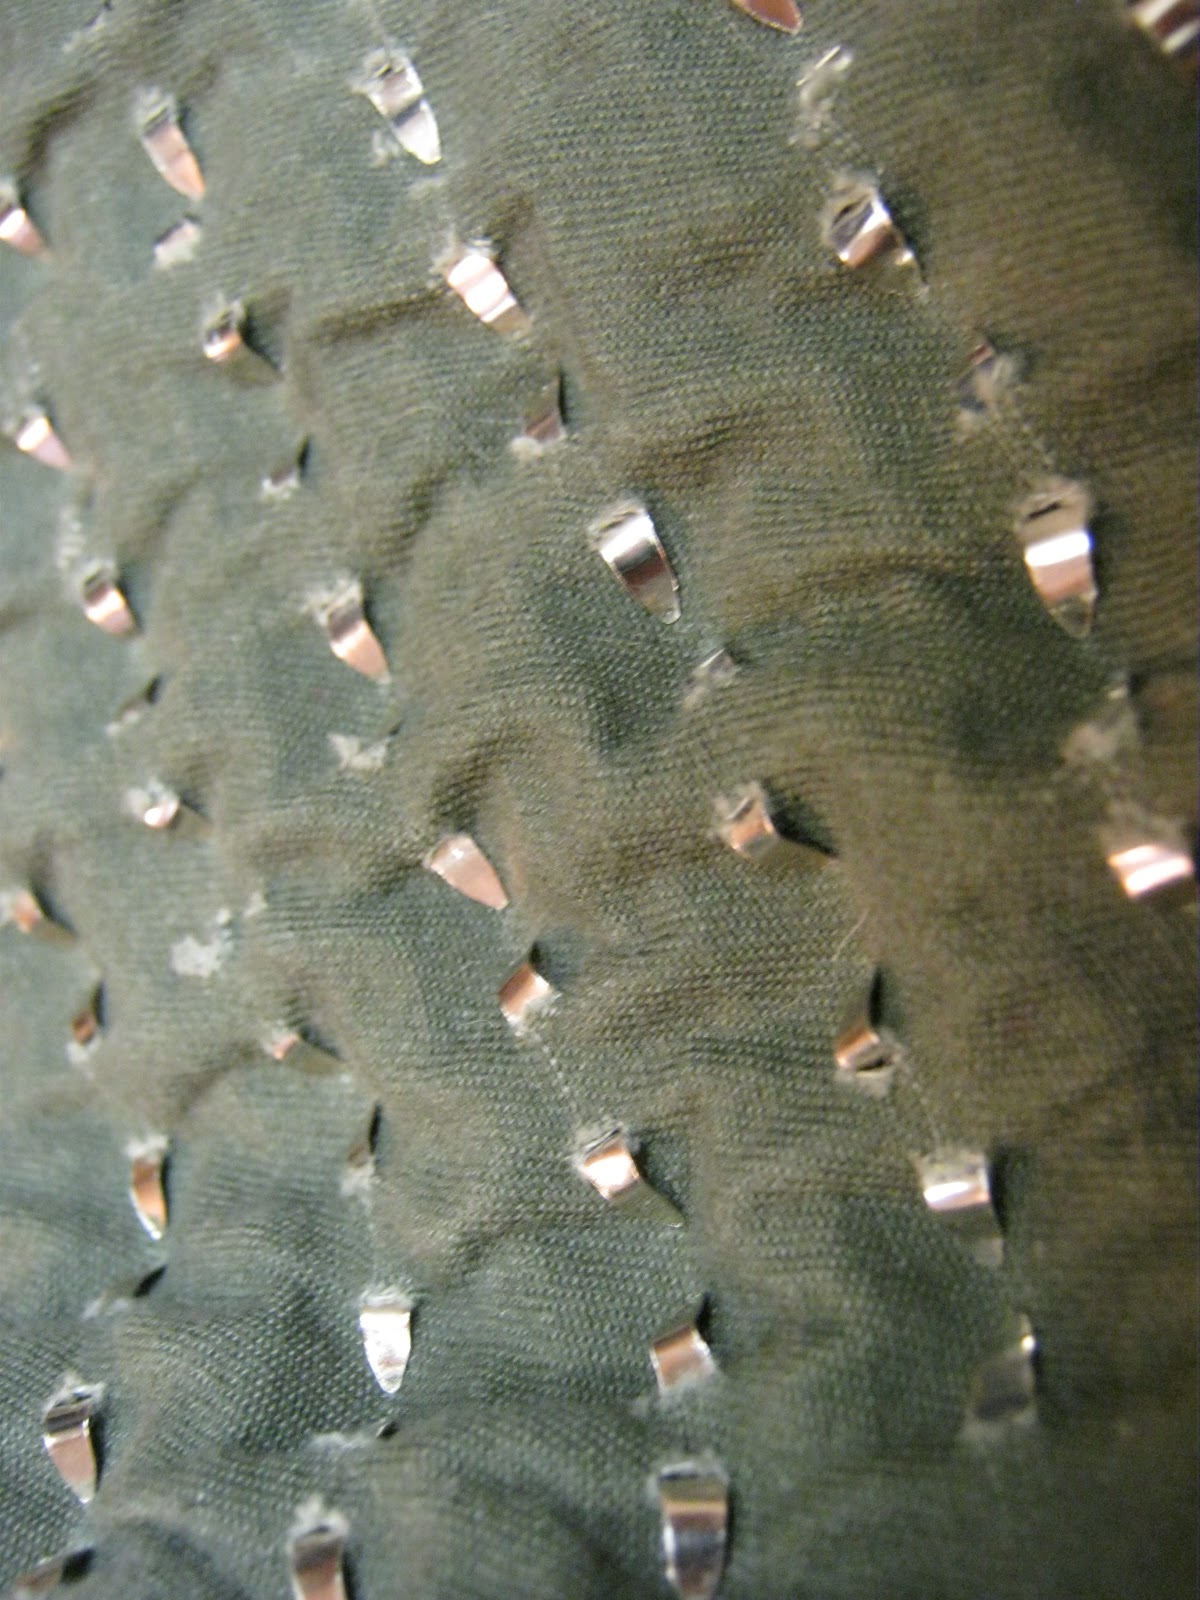
| Here's what the inside of my jacket looks like with all the studs hooked in. As you can see, the prongs are just pushed into the cavity of the stud. |
 |
| There's about 85 studs on this part of my jacket. They're so shiny! |
4. Advanced Techniques.
Sometimes your garment will have two layers of fabric instead of one, like on a pocket flap or the cuff of a sleeve. This gives you an opportunity to show off your studding skills by only hooking the studs into one of the layers instead of both. It's a little tricky, but it's worth the extra effort for a small but effective detail.
Pinch the two layers of fabric and pull them apart, then carefully push the stud prongs through the top layer and secure them. If you accidentally start penetrating the back of the second fabric, just separate the fabric layers again push the stud back out some before bending the prongs inward. You won't be able to see the secure prongs through the back once you're finished, but this is kind of the point.
5. Helpful Tips.
- Location, Location, Location- Be thoughtful about where you put the studs on your jacket. Try to avoid an area that gets a lot of physical contact, like on your arm or on the hood. Not only will the constant movement in these areas cause your studs to fall off easier, but the harsh metal prongs are likely to scratch at your skin and be uncomfortable to wear. If you insist on putting your studs in these places, consider adding a protective backing material (any fabric will do) so that there isn't as much disturbance.
 |
| This is an awl. It pokes holes in things. |
- Finicky Fabric- Depending on the type of material, you may have to add a few more extra steps before putting your studs on. A leather jacket, for example, may need to have holes pre-punched for stud attachment. If the studs aren't easily penetrating your material, get an awl or any other fine tipped, sharp poking tool (A large sewing needle will work.) Just don't make the hole too big, you want your studs to fit in your jacket quite snugly.
In other cases, the exact opposite happens and your fabric is too weak to properly support the studs. This may cause your jacket to sag or pucker. This is easily remedied by adding a fabric backing to the jacket before hooking the studs on. Attach the fabric either with a glue stick or fusible webbing. If you're not good with glue (it can get messy) I'd suggest webbing. It makes the fabric stiffer, almost paper-like. It can be pricy, so just get the basic small package they provide at Wal-Mart or any other department store.
Here is a basic explanation of Fusible Web and how it works. As a plus, you can use the fusible web to attach patches and other embellishments as well.
- Stud Maintenance- Yes, even if you secure them tightly, sometimes your studs will still occasionally fall off your jacket. That's why it's important to check your studs out every now and then to make sure everything is still where you put it. You may have to add a few new studs, or unhook old ones and put them back on tighter. Over all, this basic maintenance is necessary to keep your patch jacket in tip top shape.
If you need to wash your jacket, god forbid, put it in a pillow case to
keep the studs safe while in the washing machine. After that, you may
want to consider air-drying your jacket to avoid shrinkage or any other
damage (depending on the material.) If not, keep it in the pillow case
while in the dryer as well... and always make sure you have your machine
set on "delicate!"
That's it for now! But I look forward to writing a
PART TWO for more tips on decking out a patch jacket. In the mean time, please feel free to share with me any of your own personal stud/jacket projects. Also, if you have any questions whatsoever, go ahead and ask. After stabbing 100 little studs into my jacket, I'm kind of an expert on the subject now :P


9 comments:
Hey! Thanks for the tutorial on putting studs on jackets! I'm relatively new to the DIY scene but it's pretty awesome. Except when I'm staring at a handful of studs and a blank spot on my jacket thinking "How the f*&k do I put these on here without stabbing myself or destroying my jacket?" That's where this guide came in handy. Thanks again!
Thanks for reading nick!! I'm so glad it helped n_n you should share the results i'd love to see how it turned out!
I definitely shall! Once I make significant progress, pics shall be posted haha!
Thanks so much for this! I found it super helpful haha, I'm just starting to do the DIY stuff, but this is absolutely awesome!
No problem Soph :) If any questions about studs come up that I didn't cover, feel free to ask... Happy crafting!
thanks for this!
I thought i was the only to remove stud of belt. I have rhe same idea found even cheaper belt, cost less then buying the studs.
Great idea! Thanks for sharing :-)))
Thanks so much for sharing this. I was kind of winging it and this guidance gives me more confidence and ideas on how to do what I want to do with my battle vest.
Post a Comment