Thursday, November 10, 2011

Revamping a raggedy pillow (Harry Potter edition!)


I would say that most people have a favorite pillow. Imagine yours..It's the comfiest to sit on, it gets you to sleep at night, and its probably the best food tray you've ever used. And like most of our favorite things, it's immortal. Well, so we'd like to assume at least. Unfortunately, years of wear and tear will eventually deteriorate any item you use every day, even old faithful pillows. So what happens then? Do you dare throw out your tattered but uber comfy pillow? Don't do it! That would be a waste of a wonderful opportunity to give your loyal friend a brand new makeover. All you need is a seam ripper and a little bit of sewing magic and your pillow will keep kickin' for another 10 years or more.

 My mom inspired me to do this project when she pointed out that our living room pillow was in bad shape. And honestly, that was an understatement. Firstly, I must say it's the raddest of pillows..(Geek out time!) It's an exclusive and official Harry Potter and the Sorcerer's Stone pillow, one you can only order from those "fancy pants" magazines. It features a very young Harry Potter, right when his zany wizardy adventure was just starting. We acquired this in the heat of the first Harry Potter craze, nearly 14 years ago. This thing has history attatched to it, so there's certainly no way we were getting rid of it!

Anyways, this pillow had seen its better days. Here are the pics from right after I gutted it. It was seriously this bad before I even opened it up:
As you can see, the cool Harry Potter print is still in amazing quality but the back is dry rotten and full of holes
The corners and edges were completely shredded. 
Holes where the print was poking through the back! The horror..
 So, clearly I had to start from scratch when it came to the back of the pillow. Fortunately, the gorgeously weaved Harry Potter print on the front was still in really great shape, so I didn't have to worry about repairing it. All I needed to do was separate the trashy back fabric from the print.

I used my little tool called the Seam Ripper to do this. You could easily just use scissors and cut away the edging to your pillow, but carefully ripping out the thread seams improves the likelihood that your print wouldn't be damaged or cut off in any way.

Admittedly, I am still somewhat a novice at sewing and only recently discovered the seam ripper.

My trusty mini seam ripper.
 How did I ever possibly undo stitches without one before?  Oh right, usually I just tried to rip out the unwanted stitches by hand, tore my project and had to start over. The seam ripper has saved me many of times now since I "discovered" it. It would've been especially useful when I first started machine sewing and was constantly having zany mishaps. If you're just starting out sewing, I definitely recommend keeping one of these near by. If you don't already have one lying around, you can get them from any craft store, wal-mart or even a decent dollar store.

With my seam ripper, separating the pillow was a piece of cake.

After that, it was simply a matter of selecting some new fabrics for the back and putting it together.

That, and of course ironing.

Personally, it isn't my favorite thing to do, but ironing out the wrinkles in your fabrics before you sew them onto your project will make a world of difference in the quality of your work.
The iron is beneficial in many ways. For example, if you added any dyes or paint, it will permanently heat set it and make it washer machine friendly. Using an iron will also improve the neatness of your sewing. You can achieve nice flat and crisp seams and a professional finish to your work. Some of my projects require me to iron at least 3 or 4 different times to get the look I want... It's a pain, but it's totally worth it.

 Once ironing is complete, all you have to do is cut out the new fabric in the size you want and assemble your brand new pillow. All that technical stuff will have to wait for another blog post... In the mean time I'm assuming all of you already know how to sew together a pillow. I would strongly recommend using a sewing machine to do this kind of project. In fact, a project like this would be perfect for practicing your sewing machine skills if you're still a beginner. Sewing machines provide faster and stronger stitch work. A project like this, which would take hours to hand sew, took me only 45 minutes or so with the machine to completely finish the sewing process.  If you don't know how to use a sewing machine yet, it's never too late to learn! It may seem like a daunting task but it isn't as hard to learn as you might think. It's a skill you can use for the rest of your life.

Anyways, here are the finished results, in all their Harry Potter Glory:
GET THE SNITCH HARRY!! (front)
I had a lot of this fabric and it goes perfect with the print. (back)

Look out for that demonic beast!!
I think it looks much more neater and clean with the make over! My family members agreed that it was an improvement.  In fact, they can attest to you how comfy it is now....


As always, if you did this project for yourself, I want to see the results!

Thursday, October 27, 2011

Fake Blood Recipe and Halloween makeup tips!

Happy holidays everyone! It's that time of year again... that's right. HALLOWEEN.
It's my most favorite of all favorite holidays and I'm so psyched that it's finally here! I've been very busy this month with ghoulishy fun things to do, including party for my 20th birthday. More importantly the Charleston Zombie Walk was this month! I'm so thrilled to have something like this finally in my neck of South Carolina, I've been both years so far and it's a blast. If there's a local zombie walk you can go to, make sure to go out and see! It's a unique, life long memory.

In celebration of Zombie walk and bloody Halloween people everywhere, I've decided to share with you my perfect blood recipes! I was frustrated by the amount of searching I had to do in order to find these recipes. It was insane to me how quickly "how to" sites suggested you resort to using disgusting food items including applesauce, chocolate and even (gulp) ketchup. So needless to say, I'm against using gross and disgustingly sticky food items on your skin. I'm also against using the flimsy "store brand" of blood that they try to sell you. It's nearly 3 dollars an ounce, and the stuff doesn't even look slightly convincing.

The recipes I use are simple and can be made nearly anywhere. I've personally tested these concoctions and used them on other people- all of which seemed impressed by the results. I have the photos to prove it!


Blood results from Z DAY 2010 and 2011!


This artificial blood can be used for a few thoughtful accents, or for a monster hungry for copious amounts of blood. (for example, a Zombie Snookie)
So, how do you make it? 
Firstly, there are two different types of blood you'll probably need, especially if you're doing a zombie costume. There is an edible kind, and one strictly for skin. Here's all the supplies I used to achieve these effects:
I got all my zombie blood making supplies from Wal-Mart and the Dollar Tree. They're all household items, nothing fancy. Of course I got extra things, all you really need is the gelatin, corn syrup, coloring and extract.
Non-sticky blood for skin-

This blood looks amazing and dries solid while still giving the illusion of being wet (see zombie pictures above.) Once it sets on your skin, you won't have to worry about smearing it or sweating it off. It's perfect for giving dimension to your gore and wounds. Clean up for this type of blood is pretty simple, too. It flakes off evenly and is water soluble.  
This recipe has provided enough zombie blood for up to 3 or 4 people, but I always had some left over after using it. Unfortunately it doesn't keep for long (because the gelatin begins to solidify), so it always must be "made to order."
Get it in the baking aisle of a grocery store.

 All you need is:
  1. 1/2 a packet of Unflavored Gelatin
  2. Red, green and blue food dye
  3. Approximately 1/2 Water (varies)
  4. (OPTIONAL) tissue paper and corn starch

Start with a half a packet of unflavored gelatin in a cup or container. Add about the same amount of water as the amount of gelatin (just enough to mix the powder together and give it viscosity, don't drown it.)

The exact water amount will vary depending on what affect you're looking for. "Dripping" blood would contain slightly more water, and goopy gore blood would contain slightly less. I suggest gradually adding small amounts of water until you find a consistency you like.

The food coloring can be added next. Begin with adding 10-12 drops red (approximately) to your blood mixture. You won't need the entire bottle, just enough to thuroughly color your mixture. To darken up your blood, thus making it more realistic, slowly add blue and green by 1 or 2 drops at a time. For every 10 drops of red, 1 drops of each dark color will do.

After application, don't disturb the blood and it will dry within minutes.

OPTIONAL: I haven't tried this, but some recipes recommend you mix bits of tissue paper and cornstarch into your blood mixture. Apparently this should make it more chunky and textured, but like I said I don't really know for sure. If you try this let me know how it turned out!

Helpful Tips

I know it's hard, but resit using the blood until all of your facial makeup is done! It will ruin your makeup and blood if you try to put makeup over all of of your freshly applied blood. Your bloodiness will look best if it's the finishing touch to your outfit.

You can get bigger "wounds" if you work in layers. Let the artificial blood dry on your skin before you add more. It should stay mostly where you put it, and not run much at all. Give it 5 to 10 minutes to dry.

Always test your concoctions before the big day! You will have to experiment a few times before you get something you're completely pleased with.

Remember, if the blood seems too watery, wait a few moments for the gelatin to stiffen. Add more gelatin powder sparingly. If there is too much gelatin powder, not only will your blood not dry properly, but your mixture will be grainy and flaky. It may also dry too "tight" and not give as much flexibility on your skin.

Edible Corn Syrup blood- 

Zombie Snookie and Zombie Joker! <3
I know I said I was against sticky food blood, but this is stuff simple and necessary if you need a recipe you could actually eat. For example it went perfect with my with my Zombie Snookie outfit, enabling me to carry around a giant wineglass prop with "blood" inside it instead of wine.
It's useful for Zombies and Vampires because you can get on your teeth and mouth. Try taking a swig of it and letting it gush out your mouth dramatically for a cool effect.

I wouldn't suggest ingesting a ton of this stuff, though, because it's really thick and sticky, but it looks convincing and it gets the job done. Don't use this blood on your skin, either. It's mostly syrup, so it can get really messy and sticky fast.


Here's what you need:
  1. Light corn syrup
  2. Mint or vanilla extract
  3. Red, blue and green food dye
Add the syrup to a cup or container (like your prop glass.) Simply add in approximately 10-12 drops of red and 2 drops of blue and green. Once again, the blue and green add some darkness to your blood, making it less cartoon blood and more realistic blood.

After that, just add a flavoring extract to disguise the taste of the corn syrup. My favorite is peppermint, but vanilla extract is also popular. Most grocery stores will have these basic baking items- they're probably even all mostly on the same aisle.

OPTIONAL: I think that adding tiny amounts of water and cornstarch would make this recipe slightly less sticky. This is what I'm trying next year.

Helpful Tips

I've tasted it before, and it actually isn't as horrible as it may seem. The extract completely masks any taste of corn syrup and its strangely tasty after that.

This blood will stay liquid for a while, but you'll need to stir it every now and then to keep it fresh.

If you're taking this blood mixture with you somewhere for some reason, make sure to keep it in a well sealed container. Avoid the disaster I had last year when it got all over my camera and zombie makeup supplies.

This recipie is also actually really funny to use as "punishment" for procrastinating monsters who want to put on blood at the last minute... if they put it all over their face, they'll be sticky the rest of the night >:D

Moar Halloween makeup applying tips!

It surprised me to discover that many of my friends need serious help when it comes to Halloween makeup. It's pretty much the same as painting a canvas, except you're using really crappy materials. Even with that said, I have had a lot of success with the cheap "Wal-mart" brand cream Halloween makeup. Where I live, it's only $1 for an entire tube, and it lasts forever.
The secret to dealing with this junk is that you have to work in layers. Patience is a virtue when it comes to certain mediums in art, and this is definitely one that takes restraint!

Here's what I do to achieve decent Halloween makeup:
Me applying makeup on Charleston's Z-DAY 2010.
  1. Work light to dark- Apply the lightest color first, then put the darker ones on top of that.
  2. Don't slather it on too thick- Start with 1 layer of your color at a time. You will have to apply more than one small "coat" of the same color to achieve an even tone. If you put too much on at once, you will get a muddy look.
  3. Use shading techniques- For example, don't just use black and white if you're going for a pale look. Use an array of different colors all lightly layered on top of each other. Instead of plain black, use black, brown and green in unison. You will be surprised by the effects.
  4. Don't forget the cheek bones- For some reason if you add some dark shading to your cheek bones your makeup looks better. I don't know why.
  5. Also, don't forget the rest of your body!- Your outfit extends beyond what your face looks like. A little bit of detail on your arms, hands, and even feet will push your look to the next level.
You can also get different effects on your makeup depending on what kind of applicators you use. These are all the ones I used this year at zombie walk:

Cotton swabs, a paint brush, makeup wedges and popsicle sticks!
I will admit my favorite applicator is the makeup wedge. They were cheap (only a dollar for an entire pack at the dollar tree) and it applies the cream makeup really nice and smooth. Plus, everyone can have their own personal wedges and not have to dirty up their hands as much.

I also like the cotton balls because they can give an unusual "grainy" texture to the makeup. For zombies, it looked more like decaying flesh than a smooth white face! Q-tips can be used to get tight details and for blending.

The Popsicle sticks are used for stirring the blood recipes and heaping on big layers of the gelatin blood. They're cheap and you can throw them out when you're done!

I stumbled around and yelled "GIAHHNNI!" in my best Zombie Snookie voice.
Everyone got in on the zombie blood this year, from planners to procrastinators.

LOL I loved everyone's zombie outfits this year. Zombie bananas and LMFAO zombies.. brilliant.

Anyways, I hope my tutorials helped! As always drop me a comment if you liked this recipe, or have an even better blood concoction to suggest. I'm always looking for new ways to make blood muahaha.. Happy Halloween everyone!!


Wednesday, September 21, 2011

I LOVE my Boobs- part deux

Confused? Read "I LOVE MY BOOBS PT 1" first! 
I have been thinking about it for a long time now, and I have finally decided to iron out my boobs. Yes.. It has to be done. It will be the finishing touch on a long obsession with one of my most favorite artworks of all time. They've been with me for a very long while but I figured it was time to close an old chapter of my life and start a new one. They really didn't suit me in college, anyways.  Wanting to see pictures of my "ironed out boobs?" Here ya go...

A PERFECT PAIR OF BOOBIES...
Hmm, not what you were expecting? Don't get mad at me, nature made them that way.
These are blue footed boobs. They're seabirds that live on the Galapagos islands. As the legend is told (Aka Wikipedia), they were named by the Spanish word Bobo, which means "stupid or foolish."  Boobs are also known for their unusual mating dance, which involves a march-like ritual where both boobs literally show off how blue their feet are.

They are the weirdest seabirds ever, and I'm fascinated with them. To me, they represent not only fertility but our ridiculous pursuit of love that we all partake in,  a dance of desperation and hope that someone will finally notice our colors. (Ok, and also I read Galapagos by Kurt Vonnegut and if you havent read it yet you need to!) To this day I will even admit that the blue footed booby is my "spirit animal." Something about this unusual creature inspires me to no end.

So anyways, way back in 2007 and 2008, I went through a phase where I became obsessed with this animal. I drew it very often, making it the subject of many study sketches and even a few projects, including a major painting:

"Boobs in Love" Acyrlics

As stated earlier, I was heavily influenced by Kurt Vonnegut's book Galapagos. Especially this poem he wrote in the book, which I will share with you as I show some of my blue footed booby sketches:

“Of course I love you,
So let's have a kid.
Who will say exactly
What its parents did;
"Of course I love you,

So let's have a kid.
Who will say exactly
What its parents did;
ts parents did;
"Of course I love you,
So let's have a kid.
Who will say exactly
What its parents did; 
'Of course I love you,
So let's have a kid.
Who will say exactly
What its parents did;

'Of course I love you,
So let's have a kid
Who will say exactly
What its parents did;
'Of course I love you,

So let's have a kid
 
Who will say exactly  
What its parents did -'"   
Ect...


This sketch also includes the endless poem. It really left an impact on me as I worked on my boob projects.


Aside from the poem, the sketches and painting I did inspired me to push my series farther. As the concept sketch on the right implies, my original idea was to do a pillow companion piece for my painting. However,  I quickly realized that my fabric companion piece would be unique enough to stand on its own.
When I first began working on it, I knew very little about fiber arts, especially sewing techniques and applique. I didn't even know what applique was. In my frustration, I began haphazardly sewing without any rhyme or reason. 

The idea transformed from a companion pillow to a piece that allowed me to work with "no rules," just my pure artistic instincts. This method of reckless creation is very liberating, and I suggest you try it. Too often do artists get caught up in the little details of their artwork, consumed by the pursuit of lucidity and perfection. Not every art piece you do has to be "by the book." Sometimes, instead of following the so-called rules of your craft, your work can be created by just doing what feels natural. Just let go, and enjoy the process. It's not about how nice it looks, but how it was created.

I believe that it was this idea of lawless creation that propelled me to work on my Boobs for so long. I worked on them for about 3 years, most of my time in high school. By my senior year my peers knew very well how much I loved my project. Some friends even gave me the (somewhat unflattering) nickname "Boobs" because of this! I'm going to believe that's why they called me that, at least. 

The most incredible thing to me was how open minded my teachers were about the whole thing. In a world post Columbine, public schools state their Zero Tolerance policies for any items that could be misconstrued as weapons, including anything from guns to butter knives. Apparently, large sewing needles didn't count in this category. 

How I transported my boobs- I simply rolled them up.
In my years of school I had never once been confronted by a school official about my somewhat dangerous tool. Not only that, but I was never even told to put my boobs away. Sometimes I would sew my little project literally all day, through note taking, lectures and presentations. I imagine they were just happy I was alert and paying attention, and wasn't sleeping on my desk like the rest of the kids. 

My Boobs also served as intense therapy for me when I was stressed. It got me through my first nasty breakup, which was a very painful time in my life. I dare say that my boobs helped save my life. It was something I could do to occupy my time instead of dwelling over bad thoughts. In fact, studies have shown that sewing actually lowers your blood pressure and improves your mood. I didn't know this at the time, I just knew it felt good to do something so repetitive, and the results were very rewarding. 


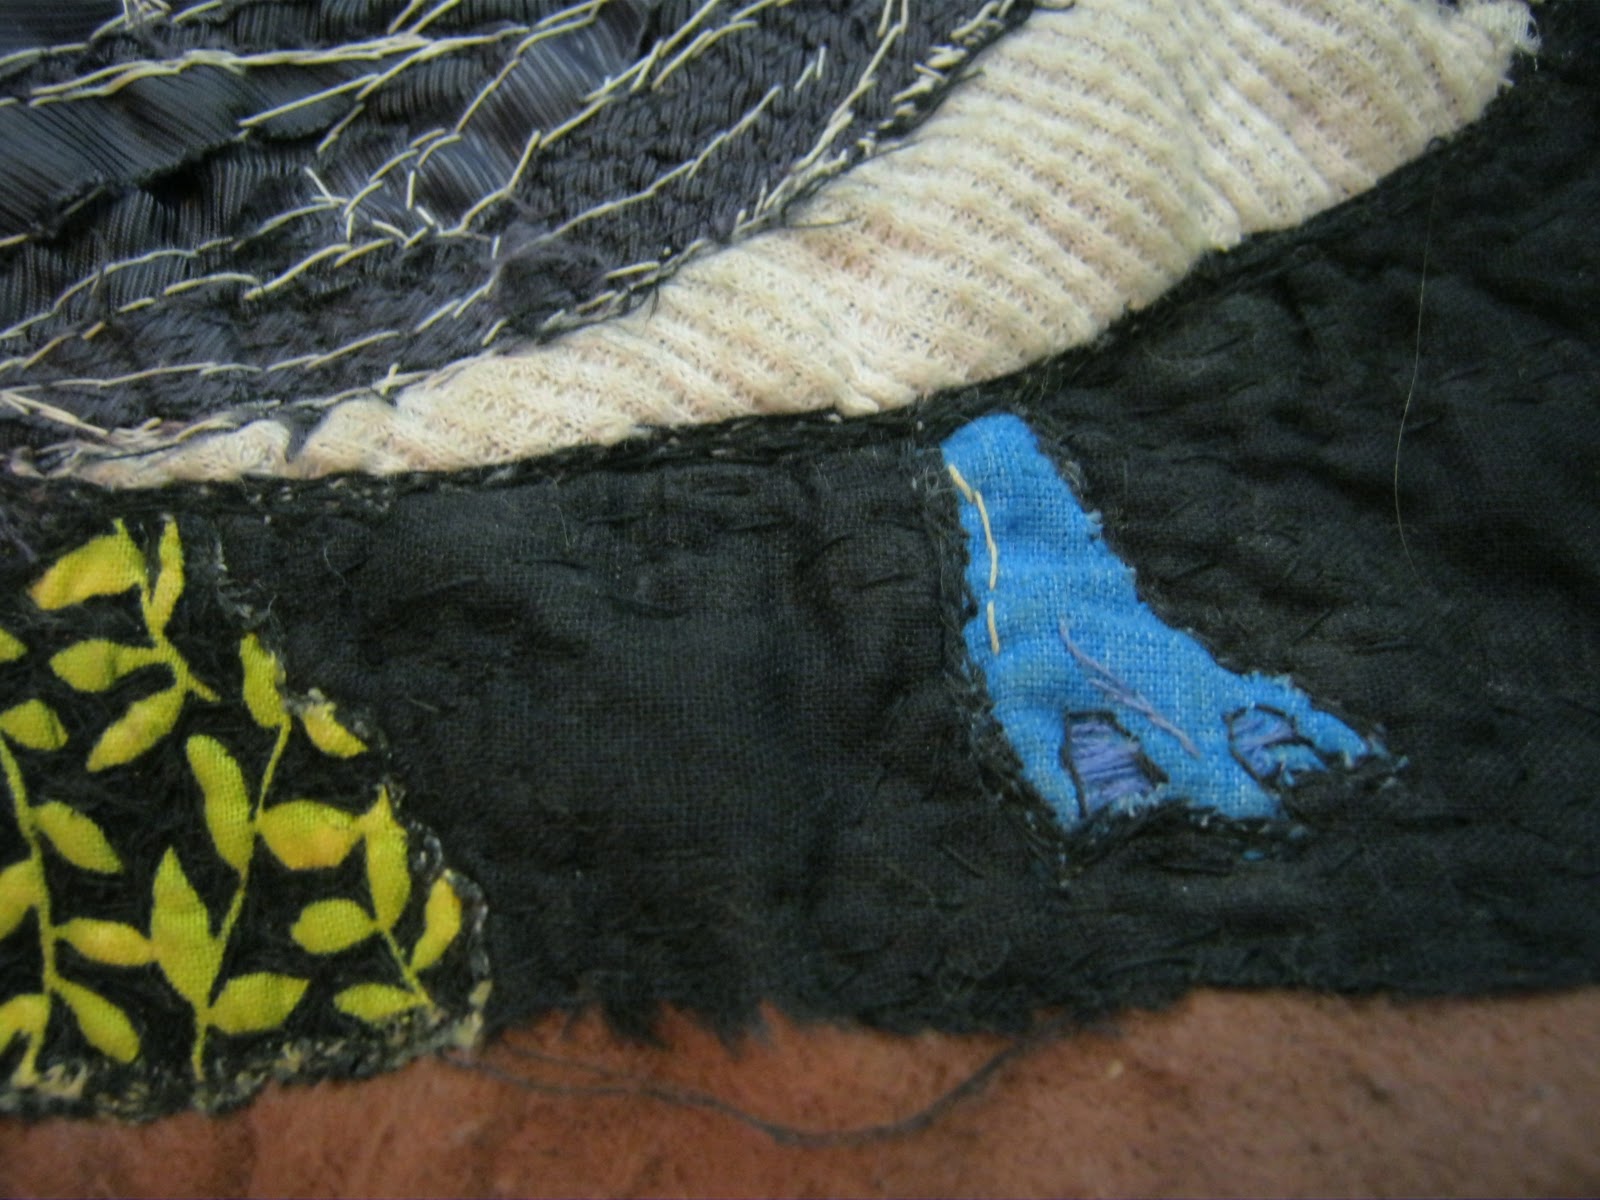
The sewing was done mostly in regular black thread. Some parts, like the outlines, have been sewn so intensely that the needle will no longer penetrate the fabric. Other parts have been textured by the string. The negative space in the leafy moss details, for example,  has been completely covered in black thread, leaving the leaves puckered and raised 3 dimensionally.


 The wings and back have also been heavily sewn in to. On these parts I used browns and grays, trying to keep true to the Blue Footed Booby design. Many of the fabrics I used were recycled scraps. I even used a piece of a white waffle knit thermal t-shirt, as you can see on the boobs' chests. To my amazement, these fabrics still remain pristine white, even after countless fingers and hands have felt its texture.


However, to truly enjoy my Boobs you just have to see the back of this piece. Behind the scenes, so to speak, reveals the chaos of my method of sewing:


The white stuff is from a gluestick. To keep the threads tight, I glued them down instead of knotting.

Eventually, as my sewing skills improved, I didn't have to glue my threads down anymore. They just stayed where they were put.

This piece has got me through thick and thin, and although I am sad to see it be finished, I truly think it's time to move on now. As you can see, there isn't much left for me to sew anyways unless I was to go for covering the entire work with thread.
In conclusion, I encourage you to start your own blue footed boob project. Start a project where there is no deadline to finish. Put it down for a few months and pick it up again. Throw caution to the wind and create something reckless. Run off of emotion, not perfection.  Try a medium you aren't familiar with, and go off of instinct instead of specific directions on how to use that medium. Trust your artistic eye. You may discover something new, and most likely it will be about yourself. And remember, art doesn't have any rules.

Wednesday, September 7, 2011

The Importance of a Sketchbook


I think sketchbooks are so fascinating. Honestly I enjoy them more than refined, finished artwork. I love finding artists that use sketchbooks, the pages always tell a very personal story about that individual's life. Flipping through these books will reveal old ideas, lists, project outlines, and personal notes... they serve as a autobiographical snapshot of the artist's life. Alas, more often I find that many artists own a sketchbook, but never use it. They're always either barely touched or have a million torn out papers and scribbled out drawings.

I've finished 9 sketchbooks since 2004, (red) one in progress!
It's truly a shame, because I have found great value in using a sketchbook. I have actively been keeping one since I was in middle school, when I discovered I needed to put all my doodles and thoughts into one place instead of crumpled notebook paper. Looking back now, I already am thankful for keeping up with it for so long. I simply wouldn't be able to function as an artist without it! I use it to flesh out project ideas, for references, practicing, and often to cure boredom. Believe it or not I've used it as a social crutch... working on a radical drawing in your book is a great conversation starter. Your sketchbook can even make you money- I have earned several commissions just because of the diligent work taken from its pages.


The back of my first official sketchbook named Pinkerton.
I, of course, take everything to the extreme and really went crazy with my sketchbooks. They're awesome to look back on now because I did a lot of cool drawings/sketches through the time I've had them. I also name and decorate all my sketchbooks, by the way, it's just part of my "ritual."  The names are mostly random, but I secretly like to believe that the books choose their own names. Weirdly enough, many of them actually reflect how I was actually feeling in real life at the time.

Here is some of the random work from my 9 sketchbooks. I love seeing how I've grown and what kind of stuff I was doing at the time.


For AP Studio Art class I had to do some stupid sketchbook assignments. Here's an over zealous self portrait!
Ooo I was such a bad kid. I drew this in after school detention.

 The frog is retelling a tale from its childhood.
A class assignment requiring me to talk about my idols and art shows I've been to. I had to do SHT!


My mind is organized. Two of my favorite geeks on the same page.
I was very proud.

This is close to how I looked my freshman year, minus the fruit.

One of the few sketchbooks with a torn out page in it. Didn't happen often!
  Oh, I forgot to mention my massive sticker collection I keep in the fronts and backs of all my sketchbook. It's probably more impressive than my artwork! I collect tons of them.. But that's a whole other story for another time. Here's a little taste of what I have in store for a future post.. Check out my stickers!


If you aren't keeping a sketchbook yet, I hope you will find inspiration to start one soon. It's never to late to start. It's an outlet for your thoughts, but it also serves as a milestone in your artistic development. To be really artsy fartsy about it, it shows how far you've come and how far you still have to go.
One last thing I think people should remember about sketchbooks is that they are perfect because they are imperfect. Our imperfections as people are what make as fascinating, and simply trying to hide that part of us by having a pristine sketchbooks with no mistakes or "only good drawings" seems pointless to me. Someone once told me to never scribble out your drawings, because you may change your mind about it later and discover it was a good idea after all. I tried to follow that idea with my sketchbooks, and it's paid off for me many times.

Also, if you're interested in more of my sketchbook stuff, check out this post for my life drawing series.

Tuesday, September 6, 2011

Genitalia face

An unusual abstract watercolor that has additional naughty hidden images inside it..
This oddball picture was an experiment in style during a sketchy part of my life. (I'm pretty sure I was having a mental break down at the time.) I did a series of these abstracts, all of them quickly scrawled out and fit together like puzzle pieces. This, however, is still my favorite of the series. I feel it has the most, erm, personality.

I like to consider my blog PG, but this is kind of pushing it a little bit. Luckily, you can't see all the "sordid bits" unless you have a perverted mind. So speaking of which, can you spot what's off about this image? How many crude representations of human genitalia can you find hidden in this evil picture?

Prints are available:

$10.00